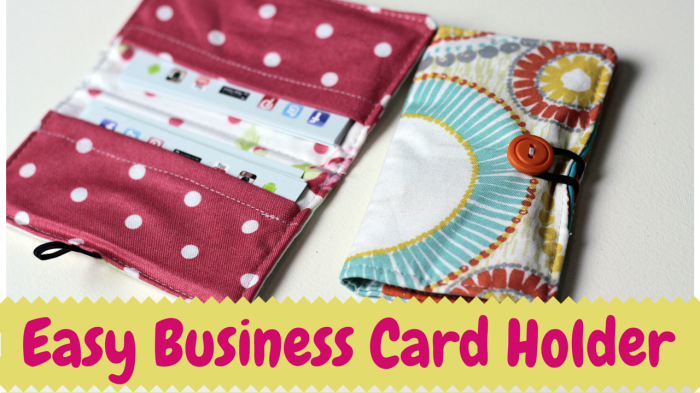
I’m back with another quick sewing project that would be great to make as gifts this month! This is a cute little fabric business card holder but it can also be used to store gift cards or even your ID and some cash– so like a mini wallet!
Make them by the dozens and drop one in every stocking! The recipients will be so thankful!
This project requires very little fabric making it a great scrap buster project! And it takes very little time to make as well. If you’re a sewing beginner, this one is for you! Totally do-able. Give it a go.
Supplies you’ll need for this project:
Now, I’ll leave you with the step-by-step video tutorial. Enjoy!
Let me know what you think in the comments below! I love to hear from you.
Happy sewing!


Bea Ramirez
Sorry I meant to say what kind of fabric would you use to make one for a man?
Vanessa Vargas Wilson
I think some dark colored fabrics would work nicely. Maybe some licensed fabric with his favorite sports teams, etc. There are also a lot of novelty prints that would be cool for a man, too. Have fun!
Bea Ramirez
Thank you Vanessa for your ideas. I will try that and the business card holder looks easy to make.
Patty
Thank you for another excellent idea, Vanessa! I read it a couple of hours ago and have already made 3! The Tim Horton’s Gift cards that I buy will go inside and voila….another stocking stuffer is ready!
Question….are you allowed to say where you got your little ironing sheet and the iron that you use with it? Having those two items would make life easier in my sewing room.
Lastly….my sister and I have a bet about you….I think you were a former teacher because your ‘lessons’ are so detailed and carefully planned. She says I’m nuts. Who wins the glass of wine?
Thanks again! Love all of you videos and have referred to them many times!
Happy holidays!
Patty
Vanessa Vargas Wilson
hahaha. Glad you enjoyed the tutorial and have whipped them up already! So easy, right?! The little ironing board I made it myself and it’s so easy you can see a tutorial I have for that here: https://www.youtube.com/watch?v=4d5SQhZ3vmc. The mini iron I use is this one: http://amzn.to/12iPjhf. I guess she owes you a glass of wine! I was a law professor before I gave it up to pursue my Crafty Gemini business full time. Good call! Thanks for sharing my videos with others. Much appreciated. 🙂
Patty
I forgot to check the following two boxes before submitting my recent comments. Please include those checks so that I can be sure to get Vanessa’s response. Thank you.
Qlt812
Thanks so much for the tutorial Vanessa!
Durriya
U are amazing great tutorial in fact all of ur tutorials r lovely ! Thanks a million for ur tutorials
Giuditta
Great job, Vanessa. Your presentations have become so polished and professional!
Elaine Brami
Great tutorial! I’m making some as gifts for Christmas. My guy liked them too, so I made him one in denim.
I’ve only been sewing a couple of months, and I have learned from your tutorials. Quilting is next!! Thank you 🙂
Vanessa Vargas Wilson
Awesome! Glad to hear it… and denim is a fab choice for this project. Keep up the great work! It’s all easy. Just takes practice. 🙂
Elizabeth
I am going to make a wallet but put an elastic over one side so when closed you just flip the elastic over. I did this with some book covers I made and it worked well.
I bought some small notebooks and made covers for them and when the book is full you just take it out and replace it, as long as you buy standard books they are easy to change
Wendy
Thank you, hope you get you 1000 .