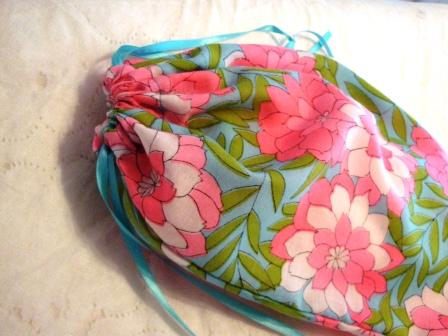
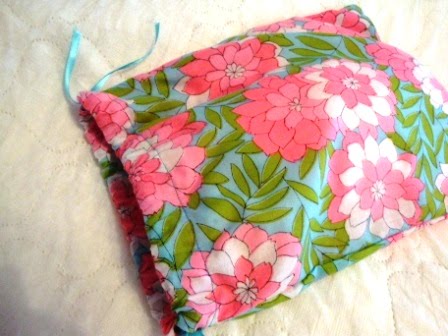
It’s been a while since I posted a video tutorial on my YouTube channel.… Sorry!!
I’ve been busy teaching four law classes per semester and keeping an eye on our walking running 11 month old baby boy all day! Oh, yea… did I mention I teach sewing & quilting classes locally and provide professional longarm quilting services?, too!
phew… I’m a busy mama.
but… I’m back!
 I’ve just posted my latest FREE video tutorial!
This is a very simple drawstring bag tutorial. All you need is a sewing machine, fabric, thread, and some ribbon. I know a lot of my followers and YouTube channel subscribers are beginners in the world of sewing and quilting so I wanted to make a tutorial for a project that is:
1) easy to make (even for a clueless beginner),
2) completely functional, and
3) has hundreds of uses!
If you’ve recently picked up sewing try your hand at this super quick and foolproof project! Even if your cutting and stitching aren’t exact, the bag will still turn out!
Don’t be afraid… you can do it!
Some examples of what you can use these bags for are:
-bread bags
-for lingerie/underwear
-to keep dirty clothes separate from clean clothes when traveling
-kids toys for car rides
-can be lined with vinyl and made into a wetbag
– carry utensils and plastic cups for a picnic
-reusable lunch bags
-gift bags
If you need some help choosing fabrics to use for this project, have a look HERE.
If you make one of these drawstring baggies make sure you upload it to my new Flickr group so others can see your Crafty Gemini tutorial creations!
Happy Sewing!


Mrs. Sassy Crafter
as always, excellent!
Nadine
Thank you! For several years I have made pillowcases for at risk teenage girls via the EMBRACING PROJECT (founded by a dear friend, Esther Brown) in Las Vegas. This year I decided a cute bag would be a nice change. I plan to fill them with “need ums”. I am sure they will LOVE them, and they can be used for so many things. Right now I expect to make about 40! Luckily, as a quilter I welcome this as a great stash buster!!!
A wonderful tutorial. Thank you so much!
Crafty Gemini
Thanks! :o)
PBL
Great tute!
Carolyn
Made 2 of these today! Thanks for the great idea!
Joyce V.V.
I have wanted to know how to do a double drawstring for quite awhile. I love your tutorial! If someone doesn’t have a free-arm model sewing machine, they can pull the bag pretty-side-out before sewing the hem for the drawstring. This puts you “inside” the bag while you’re sewing, and you can keep track of the bag body easier.
Anonymous
I’m a novice and Vanessa’s tutorials are fantastic. Very clear, easy to follow instructions. I’ve made the envelope pillow case and this bag so far. Both turned out great!
Anonymous
Vanessa I made this bag today and its beautiful! Thank you so much for a great tutorial. I just had one question: the openings where the draw strings go into look raw..is there any way to finish them off?
Crafty Gemini
I leave them raw because it’s one less thing for me to have to do. But if you want to finish them you can zig-zag stitch or serge them before your fold over and create the casing. Or you can create a really tiny hem as well.. also before you fold it over to create the casing. Hope that helps.
Anonymous
can you make it without a machine. make with bonding iron on tape
Crafty Gemini
You can try.. I just don’t know how permanent that method would be.
Kylie
I can’t wait to try this! I’m going on a trip in a few days and all the chargers will go in here instead of all over my carry on. I love watching your videos and I already made a few of your things 🙂
Anonymous
HI
Thanks so much for the tutorial.
I have made so many of these now! I use them for everything. I use them to organize my measuring spoons and cups. To give away tomatoes and cucs from the garden as gift bags, etc. etc etc
Thanks a lot.
I love it!
Kat Biggie
Thank you so much for this tutorial!
LaStitches
I made your drawstring bag today. I made mine big enough for an American Girl doll to fit in and out of the same fabrics as the school uniform that the little girl who owns the doll wears to school. I also added a front pocket with a chenille panda bear appliqued to it. (That’s their school mascot.)It really turned out nice. Thanks so much for the video on YouTube showing me how to make this!
Elizabeth J. Neal
The day you posted this, I came a cross my mini-bag/pocket made during the workshop at Haystack and thought “Hmmm, I wonder if I can remember how to make this?” and then poof, just like that, the remembering was all done for me. With pictures even. 🙂 hehe Thank you India! customized carrier bags
Anonymous
Found you via a google search. Perfect! just what I needed. Thank you very much!
Anonymous
I can not get the video to show on here or on youtube 🙁